Barbechoo's 3 favourite Burger Recipes

We’ve joined forces with UK BBQ enthusiast James McKay once again for our BBQ Brave campaign. This year the campaign focuses on burgers, so James has put together his top tips for making and cooking a perfectly juicy patty on the BBQ, alongside three of his favourite burger recipes. You can also see how he made these burgers below.
I’m not sure there is anything I like more than making burgers. They are the epitome of simple food, they’re quick to make and they taste amazing. Sure, it’s nice to splash out every now and then with a fancy steak or a really technical cook but it always comes back around to a good burger.
Ingredients
For the burger patties
- 2lb ground beef chuck
- 1 tsp onion granules
- 1 tsp garlic granules
- 1 tsp salt
- 1 tsp pepper
- 1 tsp dried basil
Whilst they are simple to prepare, burgers are not without their challenges. When we’re working with high heat on the BBQ and dripping fat, it can quickly become a hot and heavy situation – resulting in charred burgers that are not cooked all the way through. If this sounds familiar, don’t worry – I’ve got your back.
When Thermapen got in touch and asked if I’d come up with some simple tips to help you become BBQ Brave with burgers – I knew I could help. So in this recipe I’m going to show you how to create three of my favourite burgers but first, let’s talk about how to create the perfect patty.
The key to getting tasty, juicy burgers
- Using a good quality meat with a good amount of fat. You should aim for a mix of 80% lean meat to 20% fat. I prefer to use ground beef chuck as it hits these ratios and gives you an incredible burger.
- You can get beef chuck from your butcher and grind it at home or ask your butcher to grind it for you. Try to avoid lean mince as it doesn’t have the fat content needed for burgers.
- Spread your ground chuck out across a large tray to give you the maximum surface area to season the meat. Mix your dried herbs and spices in a bowl and sprinkle it evenly over all the meat.
- Gently toss the seasonings through the meat to ensure they are evenly mixed. Try not to squash or mash the meat between your fingers as this will ruin the texture of your finished burgers. Place the seasoned meat back into the fridge to allow the flavours to mingle for at least 30-40 minutes.
When you are ready to cook
- Fire up your BBQ with a good quality lumpwood charcoal, leaving a small area of the charcoal grate with no coals. This is going to be your safe zone where you can move your food to if you start to get flare ups from the fats dripping onto the coals. To build the crust on the outside of your burger, you want to sear them over a high heat so aim for a grill temperature of around 200-220°C.
- When your BBQ is up to temperature, remove your meat from the fridge and start to form your patties. I like to weigh out each patty and then form them by hand. They may not be perfectly circular but by using my hands, I can ensure they are handled with care and the texture inside the burger is loose and airy – which will give the rendering fats room to move throughout the burger.
- Place your formed patties onto the cooking grate directly over the hot coals and close your BBQ lid. Closing the lid will speed up the cook and also stop the majority of the flare ups caused by dripping fats.
- After 4-5 minutes, check that the patty has released from the cooking grates by teasing a burger spatula under it. If your patty is still sticking to the grates, then it isn’t ready to flip. Close the lid and give it another minute.
After you flip your patty
- Now is the time to add the cheese. It can take a little time for the cheese to melt so you don’t want to add it at the end when your burger is cooked. After 3-4 minutes, you want to check the internal temperature of the burger to see if it has reached an internal temperature of 72-75°C. Working with such a thin piece of meat can be tricky to catch at an exact temperature but anywhere in that range is perfect.
- Your burgers are perfectly safe to eat at those internal temperatures and more importantly, they will be nice and juicy in the middle as you haven’t overcooked them.
- Now you know how to cook the perfect patty, it’s time to put them into some amazing burgers. Here are three of my favourite burger builds to hopefully give you some inspiration but the world is your oyster. You can add any toppings you want but it all comes down to creating an incredible patty at the centre of it all.
1. The classic cheese burger
- For the classic cheese burger, make a 4oz patty using the method above. Slice a soft white burger bun in half and brush some mayo onto each half. Toast the buns over the coals, mayo side down, until they are golden brown. Keep an eye on them as they will toast quickly.
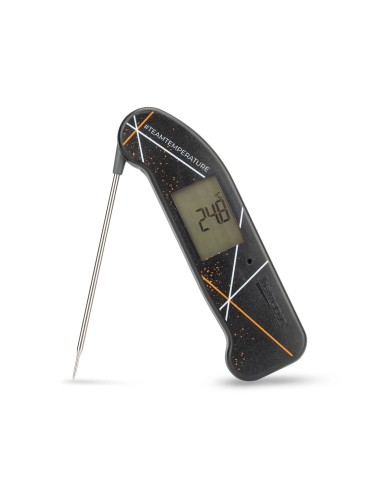
- After checking your internal temperature has reached 75°C with your Thermapen, you can start building your burger.
- Place some lettuce on the bottom bun then place your 1/4lb patty on top. Add some sliced red onion onto the patty and top it all off with the top bun. It’s a simple burger but it really allows the meat to shine through.
2. The bacon double cheese burger
- This is a huge favourite with me – I make them all the time! As we are using 2 patties in this burger, I like to make them thinner so weigh out two 3oz patties and form them with your hands, making them as thin as possible.
- These are going to cook fast so place them over the coals and give them 3-4 minutes to sear then flip them over and add your cheese to each patty. When you put the patties onto the BBQ, add 3-4 slices of streaky bacon to the grill and cook it until it’s crisp and golden. As the Thermapen can take an accurate reading right at the tip of the probe, it is perfect for taking readings on really thin burgers like this.
- Slice a brioche bun in half and brush it with some mayo before toasting it using the same method above. When you reach an internal temperature of 72°C in the middle of the burgers, stack them on top of each other and then lift them onto your bottom bun.
- Add the slices of streaky bacon on top and crown it off with the top bun. The layers of juicy burger and melted cheese put a smile on my face every time
- We’ve covered two quite traditional burgers that are quick to prepare, but let’s look at one more that is a little outside the box and takes some preparation but the results are well worth the effort!
3. The special o.p.s burger
To make the straw onions
- 2 small onions
- ½ pint buttermilk
- 1 cup plain flour
- 1 tsp garlic granules
- 1 tsp paprika
- ½ tsp cayenne pepper
- 1 tsp dried sage
- 1 ½ tsp dried basil
To make the pepper cream sauce
- 2 tbsp butter
- Small onion, finely diced
- 2 cloves garlic, minced
- 2 ½ tbsp cracked black pepper
- 1 tsp dried thyme
- 500ml double cream
- This is a massive 8oz burger patty topped with melted cheese, straw onions and pepper cream sauce. It’s inspired by a burger I tried a few years ago in a local restaurant which has since closed so it was time to come up with my own version.
- The straw onions and pepper cream sauce can be prepared ahead of time so you have them to hand when you come to putting your burgers together.
- To make the straw onions, start by thinly slicing 2 small onions and placing them in a bowl. Pour over the buttermilk and place them in the fridge for 1 hour to soak.
- When you are ready to cook, heat around 3-4 inches of oil in a saucepan until it reaches 180-190°C. You can check this with your Thermapen.
- Add the plain flour to a bowl followed by the dried herbs and spices. Mix the seasonings through the flour until they are evenly distributed.
- Remove the sliced onions using tongs and shake off any excess buttermilk. Add them to the seasoned flour in small batches, tossing them so they are completely coated then add them to a tray – ready for frying.
- When all your onions are coated, add a small handful to the hot oil and fry them for 3-4 minutes until they are golden brown and incredibly crispy. Remove them from the oil using a slotted spoon and place them on some paper towel to drain while you fry the next batch. Set the finished straw onions to one side, ready to crown your burger later.
- The pepper cream sauce is a great addition to this indulgent burger. Preheat a cast iron skillet over a medium heat and melt 2 tablespoons of butter. Saute your sliced onions and garlic until the onions are soft and translucent.
- Next add the pepper and dried thyme then cook for a few minutes until you can really smell the pepper coming alive. Finally, add the cream and give everything a mix to combine. Bring the sauce to a simmer and allow it to gently bubble for around 10 minutes or until the sauce coats the back of the spoon.
- Pour the sauce out of the skillet into a bowl to stop it cooking and you are now ready to start working on your burger. You could use 2 x 4oz burgers for this one but cooking a huge 8oz patty will help it stay nice and juicy in the middle. Weigh and form the patty and place it directly over the coals. Close the lid and let it sear for 4-5 minutes before flipping it over. Place a slice of cheese on top of the burger and close the lid.
- After a further 5 minutes or so, check the internal temperature of the burger using the Thermapen. If you aren’t quite hitting 72°C in the middle but you are happy with the sear you have on the outside, move the burger patty to the safe zone we discussed above. Close the lid of your BBQ and the burger will continue to cook but it won’t take on as much colour from the coals.
- Slice a brioche bun in half and toast it in the same way as the previous two burgers. When the patty has reached 72-75°C, it’s time to start building!
- Add a spoonful of the pepper cream sauce to the bottom bun and place on your patty. Grab a large handful of the straw onions and pile them on top before spooning over some more of the pepper cream sauce. Place the top bun on and take a step back to admire your creation. I love this burger. The rich sauce and crispy onions work so well together and with the burger but they do not get in the way of the flavour in that patty!
- I hope reading some of the tips in this article will have inspired you to give burgers a try and possibly look at them in a new light. They are fine dining for the masses and with a little love and care, they can be one of the most rewarding cooks you will do on your BBQ this year.
Thank you to Thermapen for giving me yet another excuse to play around with burgers and I hope you guys try out the one or two of the burgers above.


